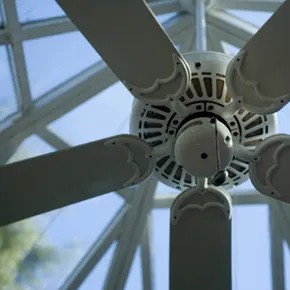
I walked in the door, my shirt sweaty and stuck to my back, and turned off the air conditioner. You are the one who flips the switch. The blades catch the air. Suddenly, you aren’t baking anymore.
It feels like magic, but it’s just physics.
Most homeowners think of Ceiling Fans as decoration. They chose the one that matched the carpet and the day was over. However, ceiling fans are machines. They have a motor, blades and a special function to move the air. Failure to understand the movement of air leads to wasted electricity.
Philip Diehl invented the first electric ceiling fan in 1882. He was trying to solve a problem that still exists: how to cool a room without freezing the lungs. The early models were big. they have big engines. It looks more like a chandelier than a fan. Diehl called them “electroliers.”
Technology has changed. The blade is now lighter. The sound of the engine has quieted down. But the core philosophy remains the same. Again, it has to do with airflow.
Rotating structure
Ceiling fans are more than just furniture. This is the system. If you’re going to install it yourself, you need to know what’s holding it up.
The base plate attaches to the power distribution box. This is the anchor. If that box isn’t rated for a fan, everything falls through the ceiling. Do not skip this check.
The motor is inside the housing. This is the heart. It converts electricity into rotational power. Inside that housing are the coil and capacitor. They determine the torque of the fan. Cheap fans have low motor performance. They wobble. they make noise. They die young.
Then there’s the blade. It does not produce lift like an airplane wing. Push the air down. The angle of the blade is important. Steeper corners move more air, but require more power. Lower angles are quieter, but move less air.
Many fans come with lights. Some even come with a remote control. Some even have smart home integration. These are add-ons. The way the fan works remains the same. Just make it easier to use.
Summer mode and winter mode
This is the part that most people miss.
Ceiling fans can be used to heat the room.
In summer, the blades should rotate counterclockwise. This forces the air straight down. You get a wind-chill effect. Sweat evaporates as air passes over the skin. It feels cool. You can turn up the thermostat. You can save on air conditioning costs.
In winter, the direction is the opposite. Rotate clockwise. This pulls the air upwards. It doesn’t cool you down. Warm air rising to the ceiling is pushed back along the walls. Circulate the heat. You can’t feel the wind. You can feel the temperature difference.
“Ceiling fans do not lower the room temperature. It lowers the wind-chill factor on your skin.”
That’s why direction is important. If you get it wrong, you are fighting your own system. In winter, if you turn the fan in the wrong direction, it will generate wind and make you cold. Doesn’t help.
Why is efficiency important?
Diehl knows that efficiency is the key to adoption. The early electroliers were too expensive for most people. They are status symbols.
Location is everything. Choose the areas that really need air circulation. It’s usually the room you use the most, the hottest room, or the room you spend the most time in. Inside or outside? This completely changes the specifications. Is the ceiling high? You need a downrod. This metal rod hangs the fan low and forces the air where it matters, instead of spinning it unnecessarily on your roof. Check the table for the correct rod length based on the height of your ceiling.
Functionality is more important than you think. Is the object cooling or warming? ambiance? Light? What you buy depends on your answer. The number of blades is mainly focused on aesthetics. The direction of rotation is for performance reasons. In summer, it must be turned counterclockwise to create breeze. In winter, switch clockwise to push warm air into the corners. The speed settings and remote control are practical upgrades, especially when mounted up high. If your room feels dark, don’t forget the lighting kit.
Style comes last. But it shouldn’t be an afterthought. Choose a fan that matches the atmosphere of your room. It is both a machine and an ornament. Prices range from $50 to $150, but fancy motors and smart features can push the price up.
Once you have received your device, the installation will begin. This is where do-it-yourselfers often make mistakes.
Prepare for installation
Let’s start with safety. Turn off the power at the circuit breaker. Not just the switch. The breaker. Make sure by testing the outlet with a voltage tester. There is no spark. No surprises.
You need some tools. Sturdy ladders are not negotiable. screwdriver set. wire strippers. voltage tester. And maybe an assistant. Ceiling fans are heavy. They vibrate. They need secure mounting.
Check your ceiling box. Is it rated for a fan? Standard light fixture boxes are not. They will fail. There should be a box that says “Fan Rated” or “Supported”. If your current box is not rated, change it. This is a code requirement in most places. Don’t skip it.
If you are installing in a new location without an existing box, new wiring is required. This can mean opening up walls and ceilings. If you are unsure about this step, consider hiring an electrician. Electricity is not a toy.
Install the fan bracket
The bracket is the anchor. Holds weight. It transfers the vibration to the structural joist. It’s not drywall. Plasterboard can crack. The bracket must be screwed directly to the ceiling joist.
Most fan kits have mounting brackets. When changing lamps, some lamps must be purchased separately. Find the joist. Use a stud finder. Mark the location. Drill pilot holes. Attach the bracket with the supplied screws. Tighten them down. Check for wobble. If it moves, it’s not secure.
Fan wiring
Follow the connection diagram in the user manual. Don’t guess. Color is important. Black usually means hot (line). White means neutral. Green or bare copper means ground.
Connect the wire nuts. Tighten them down. Tug on the wires to make sure they are secure. If the wire pulls out, the connection is loose. Loose connections can cause overheating. The heat may cause a fire.
time
Hard work: Installing the fan
You don’t need to be an electrician to replace a ceiling fan. If you’re replacing an old device, the wiring is already in place, saving you the hassle of new cables. However, this is electrical work. Respect the current.
Start by killing the power. Flip the breaker for that circuit. Don’t just turn off the wall switch, cut the juice at the source.
When it gets dark, unscrew the old fixture. Let it drop slowly and then disconnect the wires. Remove the old box if necessary.
This is a mistake that most DIYers make a mistake. Check your electrical box. Is it anchored to a ceiling joist? Is it rated for a fan? Standard light fixtures use light-duty boxes. The ceiling fan vibrated. It vibrates. We needed an electrical box suitable for the fan, which was bolted directly to the structural support. If your current box is just plastered in with anchors, it will fail. Replace it. We sell special fan boxes that extend between the joists or attach directly to the joists.
Now, you have two choices for mounting. If your ceilings are low, Flush mount For standard 8-foot ceilings, you can hang it using a downrod Screw the mounting bracket or downrod into this box. Tighten it. Be sure to wires are fed through the hole before fully tightening the bracket.
Hang the fan. Most kits have temporary hooks or straps to support the weight of the motor while you connect the wires. If yours doesn’t? Call a friend. If you hold the 10 pound motor in one hand and twist a wire nut with the other hand, is a recipe for a dropped fan or a short circuit.
Connect the wires. Black to black (hot). White to white (neutral). The green copper wire or bare copper wire is connected to the ground wire inside the box. Tighten it. Cap them with wire nuts. Pull gently to make sure they won’t slip.
Attach the fan housing and motor assembly to the mounting bracket with screws. You’re essentially hanging the engine.
Flip the breaker on. Test it. Does it hum? Does it spark? In that case, turn off the power and check the connection again. If the operation is smooth, turn the switch off again. It’s not over yet.
Install the blade
The engine is up. Now let’s talk about the visible part.
Remove the fan blade. Most are double-sided, with one side decorated and the other plain. Decide which side you want to show and install accordingly. The screws that come with the kit are usually very short. Do not use long screws. This can cause holes in the motor housing or wiring.
Screw each blade into a metal shank (iron). Tighten until tight, then back a quarter turn. It should be attached securely, but not so tight that it breaks the threads.
Next, lift the blade and iron assembly onto the engine. Slide it out. Fasten with the supplied screws. There is usually a small set screw or large wood screw that secures the blade shaft to the motor hub. Tighten evenly.
Turn the power back on.
Test the fan. Slow speed. high speed. Reverse switch. Does it shake? If so, the blade is out of balance. You may need to balance the kit or adjust the angle of the blades. However, if it spins smoothly, there is usually no problem.
What happens when you turn on the switch?
your air is moving
Ceiling fans may look simple with a base plate, motor and blades, but the design behind them creates a familiar breeze. When you flip the switch or pull the chain, electricity goes directly to the motor housing via internal wiring. This energy turns the motor, which rotates the blades at the speed determined by the fan settings.
This movement of the blade is the key. It pushes the air out and creates an air flow that circulates throughout the room. You can adjust the direction of this flow. In the summer, you need downdrafts that push the air down towards the floor. In winter, the upper currents help to push the warm air that has risen to the ceiling back into the living spaces. Most light series fans have two drawstrings that hang from a decorative case. One controls the fan speed and the other controls the light on/off. Some older or more expensive models may use separate wall switches for each function.
The Science Behind the Chill
A common misconception is that ceiling fans do not lower the room temperature. They lower the temperature of you.
When you stand under a running fan, the downdraft helps evaporate sweat from your skin. It also moves the layer of warm air around your body and replaces it with cooler indoor air. The combination of evaporation and convection creates a cooling sensation. The air actively draws heat away from the body, so it feels like a summer breeze. Without air flow, body heat is trapped close to the skin, making the room feel stuffy, even if the thermostat doesn’t change.
Save money with ceiling fans
Ceiling fans can significantly reduce your energy bills, but only if you use them correctly. The main way to save money is to raise the thermostat setting while the fan is running. The fan keeps you cool, so you can increase the temperature of the air conditioner without sacrificing comfort.
- Summer Savings: For every degree you raise the thermostat, you save about 3% in cooling costs. If you turn on the fan and raise the temperature by a few degrees, the savings add up quickly.
- Winter Savings: Reverse the direction of the fan, creating an updraft that pushes the warm air near the roof back down. This allows you to set your furnace slightly lower slightly lower, reducing heating costs.
For best efficiency, make sure the size of the fan matches the dimensions of the room. A fan that is too small does not move the air efficiently, and a fan that is too big can create too strong an air current in the room. Also keep the blade clean. Accumulation of dust can cause the fan to become unbalanced and wobble, reducing airflow efficiency. If the fan vibrates, check the mounting bracket and blade mounting screws. Tighten carefully. Be careful not to overtighten, as the strip the threads or the blade holder may be damaged.
Although the motor itself is designed to run continuously, modern brushless DC motors are more efficient than the old AC motors. If you are replacing an old appliance, look for an Energy Star certified model. These generally use less power and provide more airflow per watt. However, the biggest money-saving factor is consistency. Remember to turn on the fan when you are in the room. Turn it off when you leave. Fans only cool people, not empty rooms, so leaving them running in
The calculation is easy. Ceiling fans use only a small fraction of the electricity used by air conditioners, so you can be more comfortable for less. However, if used incorrectly, it can be a waste of money.
The default setting for most fans is to push air downwards. This creates a downdraft that forces the air straight down, giving you an instant cool breeze. This is what you want in summer.
But there is also another mode. It is also possible to change the direction of the blade.
When you switch to an updraft, the airflow changes completely. Instead of pushing air downward, the fan pulls air up and pushes it outward along the ceiling. This mixes the warm air near the top of the room with the cool air on the floor. The mixed air flows back along the walls and circulates through the space.
“The advantage of this is that you can turn the thermostat up or down a few degrees depending on the season without being aware of the temperature difference.”
This is especially important if you have high ceilings. Warm air rises. Without the updraft feature, the heat would stay there and be wasted. Reversing the fan brings it back down. In winter, this means that you can dial back your heating system. In summer, you can increase the air conditioning settings. In either case, your comfort remains the same, but your bill is lower.
However, there is a golden rule. Turn off the fan when you leave the room.
Fans are often considered to cool the air. This is not true. Keeps you cool. The moving air evaporates sweat from your skin and lowers the perceived temperature. If you are not in the room, the fan simply rotates the blades and activates the meter. It provides zero benefit to an empty house.
Keep It Running Smoothly
Dust does not only affect the appearance. It is the enemy of machines.
If ceiling fans are not cleaned, dust collects on the blades and can enter the motor or moving parts. Over time, this grit damages the mechanisms. Cleaning is easy.
Grab a dusting spray and a cloth. First, you should spread a cloth or an old sheet on the floor. The dust can’t just disappear, but it must be avoided that it falls on the couch or the floor. Do this once a week or once every two weeks.
Every few months, go a little further. Unscrew the light globes and wash them in soapy water. Rinse, dry and put back in place.
Also check the condition of the hardware. Over time, vibration can loosen screws and bolts. Loose screws can cause wobble. When released, they can cause noise. The noise usually means that the fan is about to fail, or in the worst case, come crashing down. Tighten everything in place.
lubricate the motor once a year. Check the user manual for the appropriate oil. One or two drops in the designated ports is enough to make everything work smoothly. This only takes 5 minutes and saves you a service call.
Common Problems and Fixes
If your fan starts making strange noises or behaving strangely, don’t panic. the issue is simple.
Wobbling
This is usually caused by an unbalanced blade or loose hardware. Tighten the blade brackets and downrod. If it still wobbles, try a fan balancing kit. These are cheap and effective. You clip a weight onto one of the blades until the vibration stops.
Troubleshooting common ceiling fan problems
Ceiling fans are mechanical workhorses. Blades spin. Motors hum. They run for hours on end. Therefore, if a problem occurs, it can usually be solved with a simple fix. Most of these problems do not require a professional electrician to fix them. All you need is a screwdriver and a little patience.
The Wobble
Nothing ruins a cool breeze like a ceiling fan that threatens to fall off the roof. Wobbling is almost always an imbalance issue. Let’s start with the basics. Tighten each screw. Check the bolts holding the blade to the motor housing. If the hardware is loose, the whole assembly shakes.
If the screws are tight, look at the blades. Is it deformed? Bent from a ladder bump? Even a slight curve throws off the balance. You can try to gently bend them back into alignment. Or, just buy replacement blades. It is very cheap.
Need a quick fix? Grab a balancing kit. They cost a few bucks. You clip small weights onto the blades. Adjust until the wobble stops. This is the easiest DIY win in home maintenance.
Noise
Humming or buzzing? This is very annoying. First, check if there are any loose parts. Something might be knocking against the blade or the housing. Tighten what you find.
If you have just installed the fan, wait 24 hours. It takes time for the factory lubricant to distribute evenly to the engine bearings. Run it. Let it settle. If the sound continues even after a day, the motor might be defective. Call the manufacturer or dealer. Do not continue to use a fan that sounds like it is not working.
The Lights
If the fan light does not come on, the problem is most likely with the bulb. It is usually wiring. Check the connection. Are the house wires attached to the correct fan light wires? Mistakes happen during initial installation. Over time, vibration can also loosen wires.
Turn off the power at the circuit breaker. Pull down the light kit. Check for loose wire nuts or exposed copper that isn’t twisted together. Reconnect them tightly. Test it. If it still fails, the switch module inside the housing might be bad.
Poor airflow
Not feeling the breeze? Check for the issues listed above. A wobbly fan moves air inefficiently. Loose blades create drag. Also, remember the direction setting. In winter mode (upflow), warm air is pushed up along the roof. The perceived wind is minimal. This is by design.
If you can’t get air even in summer mode (downflow), the fan may be too small for the room. The 52 inch fan is suitable for the bedroom. Don’t do anything for large rooms. Larger spaces require more blades.
Effect of fan direction on temperature
The direction of rotation is more important than people think. The air flow inside your home changes.
We need invoices in the summer. The blades push the air straight down. This can create a wind-chilling effect on your skin. It feels cool. You can raise the thermostat a few degrees and still feel comfortable.
When winter comes, it lights up. Fans are now creating an Updraft. It pulls cold air upwards and pushes the warm air that has risen to the ceiling back along the walls. In this way, the heat can circulate without creating drafts under the feet. Save energy. The room feels evenly warm.