Your balcony pots are drying out faster than you can pour water into them. It is a common spring trap. The sun hits the soil, the surface crusts over, and half your watering effort evaporates before reaching the roots. You end up bending over a hose or carrying a watering can just to keep a few herbs alive. This system changes that. It uses a glass jar from your recycling bin to keep soil moist for weeks.
You do not need a specialized irrigation kit. You need a jar, a nail, a hammer, and some fabric. The setup mimics ancient ollas, those porous clay pots used for centuries to deliver water directly to root zones. Here, the glass jar acts as a sealed reservoir. Water moves slowly through a fabric filter into the soil. No evaporation loss. No water running down the sides of the pot.
What you need to build this DIY irrigation system
Gather these items before you start.
- One clean glass jar with a metal lid. A 250g to 400g jar works for small pots. For larger planters or small shrubs, use a 750g to 1L jar.
- One large steel nail.
- A hammer.
- A 10cm square of absorbent fabric. Old cotton cloth or geotextile felt works.
- A hand trowel or transplanting tool.
Size matters. A small jar might last a few days in heat. A larger jar can last almost a month. If you are going on a weekend trip, go for the bigger size.
How to modify the jar lid
This step takes care but is quick.
- Place the metal lid face down on a small wooden block. The block absorbs the impact so you do not crack the glass or deform the metal.
- Use the hammer and nail to punch three or four holes in the center of the lid.
- Do not hit too hard. You want clean holes, not a dented mess. The lid needs to still seal tightly against the jar.
- Flip the lid over. Place the square of fabric right over the holes, inside the lid.
The fabric is the key. It acts as a wick. It slows the water down, forcing it to seep out slowly rather than gushing. This prevents waterlogging and mimics a drip line.
Where to bury the jar in your pot
This is the most important step for success.
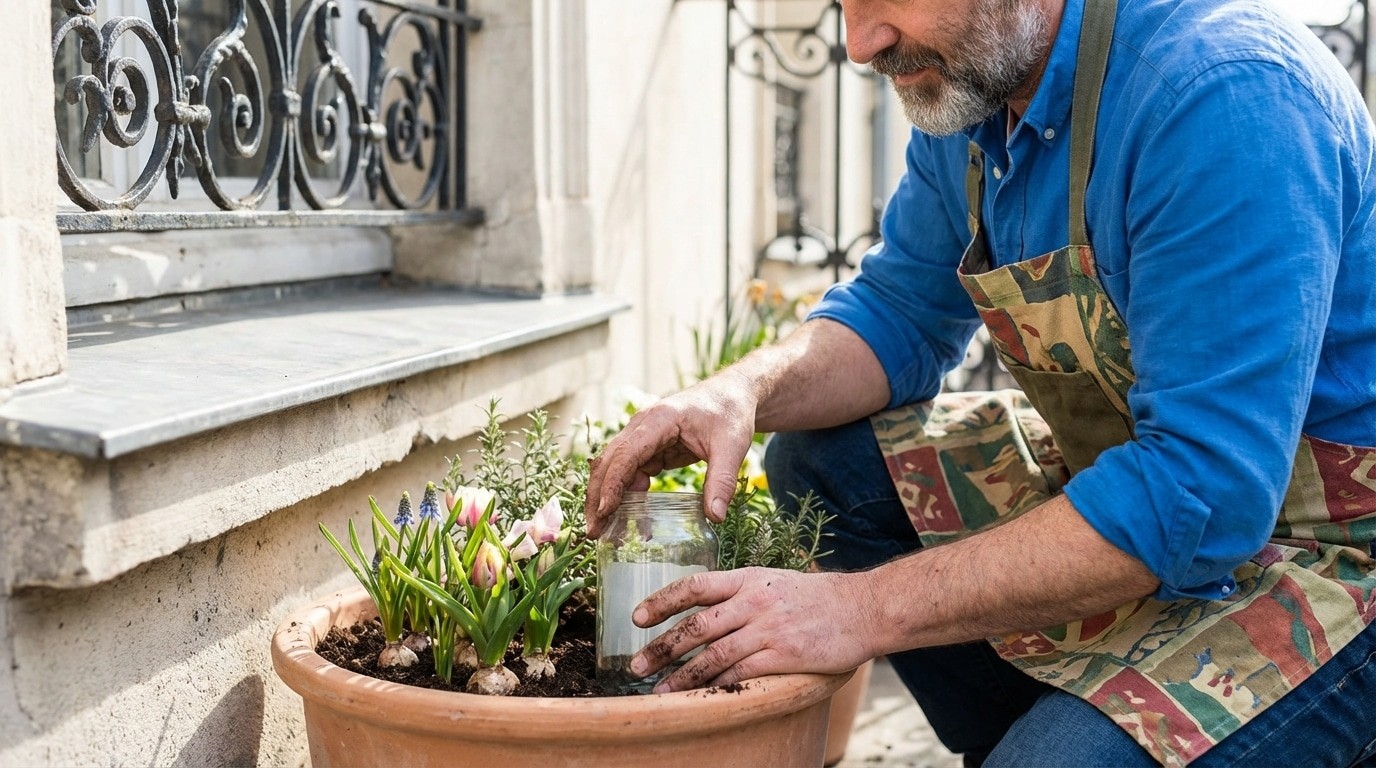
- Dig a hole in your potting soil. The hole should be located halfway between the plant stem and the edge of the pot.
- Be gentle. Spring roots are fragile. Do not sever them.
- The hole depth must match the height of your jar.
- Fill the jar with water.
- Put the lid on.
- Invert the jar. Push it into the hole so the lid is at the bottom, buried in the soil.
- Only the flat bottom of the glass jar should be visible at soil level.
Yes, the jar is upside down. The holes in the lid are now at the bottom, pressing against the soil. Water seeps out through the fabric and holes directly into the earth.
Why this works better than traditional watering
Standard watering is inefficient. Water hits dry soil, evaporates, or runs off. This system delivers water exactly where it is needed: the root zone. The soil stays consistently moist. The plant does not experience the stress of alternating dry and wet cycles.
Check the glass bottom. When the jar is full, the bottom is clear. When it is empty, you see the soil through the glass. That is your signal to refill. It is a simple visual cue. No guesswork.
This method is not a fix for everything. It is for maintenance. Water the plant normally before installing the jar to ensure the soil is already moist around the roots. The jar sustains that moisture. It does not replace initial hydration.
For a balcony full of herbs, this setup saves time. For a few large planters, it saves water. The cost is negligible. The effort is ten minutes of work. Your plants will not wilt while you are away.
The glass bottom catching the sunlight is a nice touch. It looks intentional. It also makes monitoring easy. If you see soil through the glass, refill the jar. If the glass is full, do nothing.
Start small. Try it with one pot. See how long the water lasts. Adjust the jar size for the next one. This is not a permanent installation if you do not like it. You can pull the jar out. But you probably will not want to.
Filling and priming the irrigation vessel
The first real test happens here. Fill the container to the brim with tap water. Let it sit out for a few hours first. Cold water from the line can shock young roots. Warm water is safer.
Screw the cap on tight. Make sure that fabric gasket is in place. It prevents leaks at the seal. Now comes the flip. Turn the whole unit upside down. Press it firmly into the pre-cast cavity.
Watch the glass walls. You should see a few bubbles rise within seconds. That is the system working. The soil outside is pulling water in through natural capillary action. It takes what it needs, when it needs it. If the wind or sun dries the top layer, the soil pumps more moisture from the reservoir. No manual intervention required. It self-regulates based on evaporation rates.
Why this setup saves your balcony plants during vacation
You have probably stood on a porch, staring at a dying fern, wishing you had a neighbor who actually liked watering. This DIY reservoir eliminates that anxiety. It delivers a consistent, low-volume drip over weeks.
It avoids the two main killers of container plants:
– Desiccation: The soil surface dries, but the roots stay hydrated from the bottom up.
– Rot: The slow release prevents the saturated, anaerobic conditions that cause root rot in saucers.
This works for more than just decorative flowers. Cherry tomato seedlings, basil, and other aromatic herbs thrive in this setup. The steady moisture prevents the stress of fluctuating water levels, which is critical for edible crops in pots. Each container becomes a mini-ecosystem capable of handling a dry summer spell without daily attention.
Preparing for the dry season with repurposed packaging
This project turns a piece of household packaging into a functional gardening tool. It is a practical form of upcycling. You are reducing waste while improving plant health.
If you are planning a long weekend or a holiday trip, start collecting suitable containers now. Check the structural integrity of the glass or plastic before committing to the project. The reservoir needs to hold pressure and resist cracking when inverted.
Set up these units before the peak heat arrives. It is easier to monitor the initial capillary flow in spring than to troubleshoot a dry system in July. The goal is simple: let the physics of soil and water do the work for you. You handle the harvest. The system handles the hydration.