Eva Bowker had a deadline looming. A kitchen renovation was on the line, and the cabinets needed to be done yesterday. Standard oil-based paints would have kept her waiting 24 hours for a single coat to dry. She needed speed. That’s when she found milk paint.
The powder form dries in under 30 minutes. It saved her project.
But the speed isn’t the only selling point. According to Bowker, who coordinates home improvements for Fantastic Handyman Australia, the real magic lies in the prep work. You don’t need to prime. You don’t need to sand. This matters when you’re rolling up your sleeves and doing the labor yourself.
“One of the best things about milk paint is the fact that it doesn’t require priming or sanding before application,” Bowker says. “This makes the whole process a lot easier and saves you a ton of time.”
She points out that the nontoxic, nearly fume-free nature of the product sets it apart from traditional latex or oil paints. It’s made from simple ingredients. If you’re worried about volatile organic compounds (VOCs) lingering in your newly remodeled kitchen, this is a safer bet.
The Science Behind the Powder
People have been using this stuff for millennia. Cave drawings from 6,000 years ago depict its use. Back then, it was just household ingredients mixed with natural earth pigments.
Today, the formula is more controlled but still rooted in nature. The powder you buy online or at a hardware store consists of three main components:
- Casein : This is milk protein. It acts as the binder, holding the paint together.
- Lime : This ingredient makes the paint hard and durable once it cures.
- Natural Earth or Mineral Pigments : These provide the color.
Why powder? Because once you add water, the clock starts ticking.
“Because the paint will begin to spoil once it’s mixed with water,” explains Sausha Khoundet, owner of Sweet Pickins Milk Paint. Her company invented the original powdered version sold in the U.S. in 1973. The powder form allows customers to mix small batches on demand. You only make what you can use in a day.
How to Make Milk Paint at Home
You don’t have to buy a bag of powder if you’re feeling experimental. Martha Stewart has a recipe for DIY milk paint that uses basic kitchen items.
Here is what you’ll need:
- 1 quart of skim milk
- Lemon
- A sieve
- Cheesecloth
- Dry color pigment or artist’s acrylic paint
The process involves curdling the milk with lemon, straining the solids, and mixing the resulting casein with your chosen pigment. It’s a hands-on approach. It requires a bit of elbow grease, but you control the exact consistency.
Commercial options are widely available from major paint companies if you prefer not to curdle your own milk. Whether you buy it or brew it, the result is the same. A fast-drying, eco-friendly coating that adheres without the usual sanding headaches.
The only catch? Once it’s wet, it’s on. You can’t just leave the bucket open for a week. You have to plan your project around the pot.
For Bowker, that trade-off was worth it. The time saved on prep and drying outweighed the need to mix the powder carefully. She got the cabinets done. They looked good. And the air in the house stayed clean.
It’s a material that feels old-fashioned but works like modern chemistry. You mix
Is It Actually Easy to Use?
“Super easy,” says Khoundet. The process is straightforward. Mix the powder with water at a 1:1 ratio. Use a spoon if you have to, but a whisk is better. It ensures the paint is smooth and creamy. No lumps.
Once mixed, apply it like any other paint. Let it dry. Lightly sand the surface until it feels buttery-soft. Then, apply your sealer.
“Milk paint is very forgiving,” she notes. You won’t see brush marks. Touch-ups blend in easily. Because it is a powder, you control the consistency. Mix it thick for texture. Thin it out for a wash or stain.
How Milk Paint Differs From Chalk Paint
Prep work is similar for both. Neither is objectively better. It comes down to preference and the look you want. Here are the key differences.
- Form and Ingredients: Chalk-type paints are newer. They come pre-mixed. True milk paint is a powder. If it is pre-mixed and labeled “milk paint,” it is likely acrylic-based. Milk paint uses natural ingredients: limestone and casein. Most chalk paints are not all-natural.
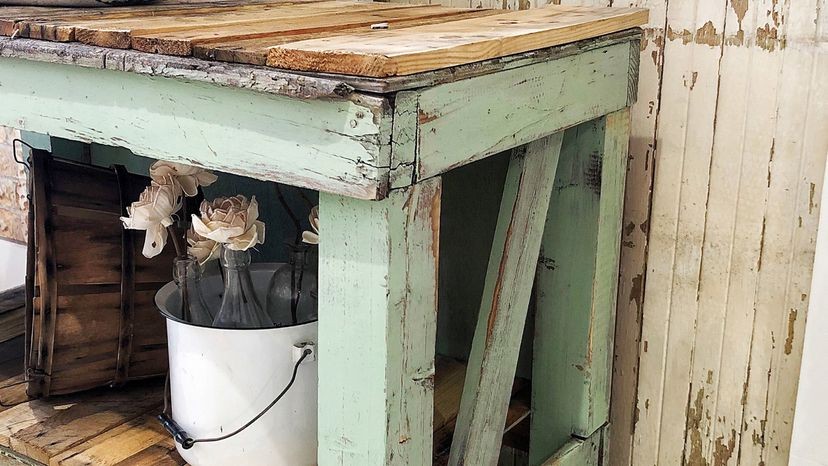
- Visual Finish: Milk paint offers depth and dimension. It has a mottled appearance. Other paints, like chalk-type, latex, oil, and lacquer, are flat and one-dimensional. Milk paint has character. Even undistressed, it looks unique.
- Consistency: Powder form allows you to adjust thickness. Thin it for a stain. Thicken it for texture and aging. Chalk paints are generally thicker and pre-mixed.
- Distressing: Milk paint chips and flakes naturally over certain finishes. It crackles. Chalk-type paints do not do this naturally. You have to force distress them or use techniques to create cracks. Both can be glazed and waxed.
Where and How to Use Milk Paint
Most people use it for furniture, wood projects, and walls. It is versatile. You can use it on artwork. You can even paint buildings.
Vatican City used traditional milk-based paint to touch up the exterior walls of the Belvedere Palace. This 15th-century palazzo north of St. Peter’s Square holds treasured art. The original cream color from the 1500s was made from milk from local cows, slaked lime, and natural pigments. Workers hand-patted it onto the walls.
“Milk paint has a look that’s unlike any other paint,” Khoundet says. The finish is flat. You can burnish it for a sheen. It has an Old World mottled look. Color varies. Woodworkers like it for mimicking historic Colonial furniture. It adheres well to wood. It layers easily. It distresses easily.
“There is also a huge movement right now of furniture painters,” she adds. They love the authentically aged, worn, and chippy look. This happens naturally when painting over certain surfaces.
6 DIY Milk Paint Projects
Here are some ideas to get you started.
- Birdhouses. Start with a simple wooden birdhouse. Use red milk paint and stencils for a farmhouse style.
- Decorative Mason jars. Plain jars used as vases or glasses? Transform them into colorful decor.
- Accent walls. Use light shades behind kitchen shelves. Use dark gray in a home office.
- Headboards. Make your own. Finish with milk paint. Avoid pallets. They can harbor bugs, mold, and harsh chemicals.
- Boxes and crates. Revive old wooden fruit boxes. Use them to organize a mudroom.
- Wood cutouts or frames. Paint wood cutouts like hearts or stars. Finish wood picture frames.
The Bottom Line
You do not need to spend hundreds of dollars on furniture for the farmhouse look. Becky Beach, a designer behind the blog Mom Beach, suggests buying old wooden furniture at a flea market. Repaint it with milk paint. You get a matte finish. You get a worn-out look. It is perfect for trendy farmhouse décor. Display it in your home. Or sell it for extra money.
“The best way to mix milk paint is to use an immersion blender… it does make for easy and fast mixing, and is great way to get the paint extra creamy.” — Sausha Khoundet
Khoundet offers another tip. Use warm to hot water. Add it to the cup first. Then add the powder. Let it sit for a few minutes. Add a touch more water. Milk paint thickens as it sits. Stir again.