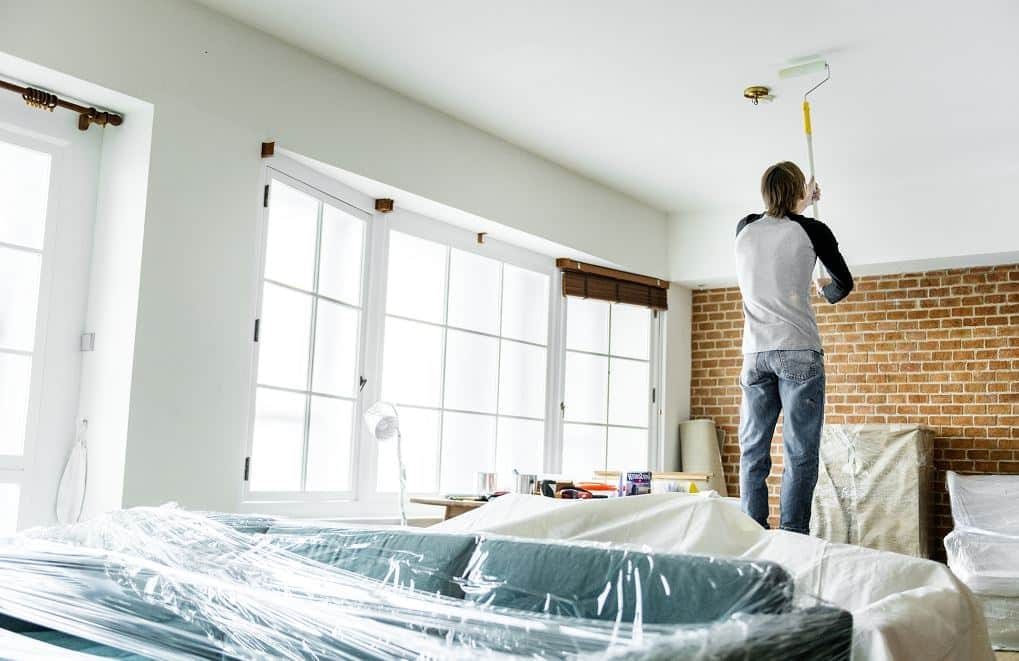
Your ceiling looks tired. Maybe it’s stained, or just dull. You want that crisp white back, but the thought of dragging up a ladder and stretching your arm for hours makes you hesitate. There is a better way. Using an extension pole for ceiling painting isn’t just possible; it’s smarter. It saves your shoulders. It keeps you off the ladder longer. But before you dip a roller into the tray and start swinging, you need a plan. Rushing this leads to drips, missed spots, and frustration. Here is how to do it right, step by step.
Why Use an Extension Pole for Ceiling Painting?
Ladders are unstable. They wobble. You’re balancing on a narrow rung while trying to control a heavy, paint-laden roller above your head. One slip and you’re done. An extension pole changes the physics. You stay on the ground. You keep your balance. You can reach further without contorting your spine.
This method works for standard drywall ceilings, textured ceilings, and even vaulted ones. The key is control. A pole lets you apply even pressure. It reduces fatigue. It makes the job feel less like a workout and more like a task. But only if you prep correctly.
Gather the Right Tools and Materials
You can’t wing this. You need specific gear. Cheap rollers shed lint. Cheap poles wobble under load. Don’t cheap out where it matters.
- Extension Pole : Get one that’s telescoping. It should lock securely. Look for a threaded end that fits standard roller frames. A lightweight aluminum or fiberglass pole is easier to handle than heavy steel.
- Roller Frame and Cover : A 9-inch or 12-inch roller works best. Use a thick nap cover (3/8 inch or 1/2 inch) for textured ceilings. A smooth nap (1/4 inch) for flat drywall.
- Paint Tray : A standard tray won’t work on the end of a pole. You need a deep tray or a bucket-style tray that attaches to the pole. This keeps the roller saturated without constant dipping.
- Paint : Use a high-quality flat or matte ceiling paint. It hides imperfections better than eggshell or satin. White is standard, but check for off-white options if your walls are warm-toned.
- Drop Cloths : Canvas drop cloths are better than plastic. Plastic slips. Canvas grips. Cover the floor completely. Move furniture to the center and cover it too.
- Painter’s Tape : For edges where the ceiling meets the walls. Use blue tape, not red. It’s less likely to peel paint when removed.
- Screwdriver or Putty Knife : To remove light fixtures, smoke detectors, and vent covers.
- Sandpaper : 120-grit for smoothing out any bumps or previous paint drips.
- Primer : If your ceiling has stains, new drywall patches, or you’re covering a dark color with white.
Prep the Room Like a Pro
Prep takes time. Skip it, and you’ll pay for it later with touch-ups and cleanup hell.
- Clear the Room : Remove everything you can. If you can’t move it, cover it. Double-bag
Why a Telescopic Pole Changes the Game
You can keep climbing up and down the stepladder, burning through your quadriceps with every pass. Or you can use a telescopic pole to paint from the floor. The difference isn’t just about comfort. It is about safety.
Standing on a ladder increases the risk of a fall. A pole keeps your feet planted. It also removes the frustration of dragging a ladder back and forth as you move across the room. This is especially important if you have high ceilings. The pole lets you cover more ground with fewer moves.
But let’s be honest. A long pole feels unwieldy at first. It can be hard to control. The stroke might look choppy if you haven’t practiced. You might miss spots or leave visible overlaps. This is why preparation matters more than raw strength.
Inspect the Surface Before You Start
Do not skip the prep work. If you paint over dirt, you lock it in.
- Clean the surface. Use a soapy sponge to wipe away grease and dust. Let it dry completely.
- Check for damage. Look for cracks, holes, or rough spots. Fill them with spackling compound. Sand smooth once dry.
- Plan your coats. Assess the current state. Do you need a primer? How many topcoats? Measure the square footage. Buy enough paint to cover the area without running short.
Selecting the Right Gear
Cheap tools make cheap jobs. When painting a ceiling, your materials dictate the finish.
Paint Selection
Don’t save money on the can. High-quality paint applies smoother and covers better. Use paint designed specifically for ceilings. Acrylic latex is the standard. It has low odor and dries to a matte finish, which hides imperfections well. You will likely need two coats for a uniform look.
The Pole
Look for an aluminum telescopic pole. It is light enough to hold overhead for hours without giving you arm fatigue. Ensure it has a locking mechanism that prevents rotation. This keeps the roller attached and stable.
The Roller Cover
Buy a roller cover from the same brand as the pole. Compatibility matters. The size depends on your skill level and the ceiling texture.
- Small rooms or beginners: Use a 180mm roller. It is easier to maneuver.
- Large rooms or pros: A 200mm or 250mm roller works best.
For smooth ceilings, choose a woven polyamide nap. Look for a thickness of 10 to 12mm. This provides good paint release and minimizes lint shedding. Cheap rollers shed fibers onto the wet paint. You do not want that.
Essential Extras
You will also need:
- An angled sash brush for cutting in corners.
- A small 110mm roller for edges.
- Painter’s tape.
- Drop cloths and masking tape.
- A paint tray (or “truck”).
- Primer, if needed.
- A paint mixer and protective clothing.
Timing Is Everything
Heat is the enemy of a good finish. If you paint in the middle of summer, the paint dries too fast. You cannot blend the seams before they set. This creates visible lap marks.
Wait for milder weather. Ideally, work when the room temperature is between 18 and 22 degrees Celsius. This gives you enough open time to roll smoothly and hide overlaps.
Preparing the Site
Before you open a single can, protect the room. Cover the floor with drop cloths. Tape off the trim. You need a clean workspace.

La préparation est fastidieuse. Everyone knows it. You want to skip it. But if you rush the prep, the paint will fail. Think of it as an investment. You put in the time now. You get it back when you roll.
Here is how to set the stage correctly:
- Clear out as much furniture as possible. You need space to move. You also need to avoid tripping over your own feet or smudging wet paint.
- Lay down a drop cloth. Keep it tight. Tape the edges down so it doesn’t shift while you’re working.
- Apply masking tape to the walls. Stick it right at the ceiling line, going all the way around the perimeter.
- Set up your extension pole. Adjust the height for comfort. A bad setup means back pain and a sloppy job.
- Stir the paint. Use a mixer. Don’t just dip the stick in and pray. The pigment needs to be uniform.
- Dampen your brushes and rollers slightly before loading them. Dry bristles absorb too much paint. Wet ones release it easier. This helps with application.
- Put on your coveralls. It’s time to work.
Why Skipping Primer is a False Economy
You might think about skipping the primer (sous-couche). It seems like a waste of time and money.
It isn’t. It’s mandatory.
Primer prepares the surface. It makes the paint stick. It stops the paint from flaking off later. It smooths out minor imperfections for a more uniform look. The top coat goes on easier. It goes on faster. You use less paint. The final result is actually better. Don’t cut corners here.
The Right Way to Paint with an Extension Pole
Once you’re prepped, painting the ceiling isn’t hard. You just need the right technique. Follow these steps.
- Cut in the corners first. Use a sash brush. If the room is under 12 square meters, do the whole perimeter. For larger rooms, cut in as you go to hide mistakes.
- Go over that perimeter again. This time, use a small roller. It widens the “cut-in” zone. It also keeps your body away from the wall.
- Load the roller properly. Roll it on the paint surface. Then drag it lightly over the ridges in the tray. You want it fully loaded. But not so loaded that it drips when you lift it.
- Start at the back of the room. Paint away from the light source, moving toward it. This hides shadows and streaks. Righties start at the right corner. Lefties start at the left.
- Grip the telescopic pole firmly. Start rolling. The roller should glide. Don’t press down hard. Let the weight of the tool do the work.
- Don’t overreach. Paint a distance about twice your shoulder width. Keep your elbows slightly bent. This protects your joints.
- Reload every two roller widths. That’s about 40 centimeters.
- Paint in lines. Overlap each line by about 5 cm. If the paint is high quality, you don’t need to cross-hatch. Just keep it even.
Ergonomics: Save Your Body
The secret to a good ceiling job isn’t just the paint. It’s your posture. Bad posture leads to injury. It also leads to streaks.
Stand with your shoulders parallel to the wall in front of you.
Plant your feet shoulder-width apart. This gives you stability.
Move in straight lines. Go left to right. Do not rotate your torso. If your shoulders turn, your roller track won’t be straight. You’ll get messy edges and uneven coverage.
Don’t stand too far back. You’ll strain your lower back. Don’t stand too close, either. You’ll arch your neck and hurt your cervical spine. Plus, you’ll get paint in your hair. Nobody wants that.
The Second Coat for a Perfect Finish
Let the first coat dry completely. Check the surface. Look for bumps or texture issues.
If you see any, use fine grit sandpaper (150 grit). Sand gently. This knocks down the high spots. It also removes any stray roller fibers or hairs.
The air might be dusty from the work. Wipe the ceiling with a microfiber cloth before you start the next coat. Clean surface means clean paint.
Apply the second coat just like the first. Same technique. Same care. The result will be solid. You’ll have a ceiling that looks professional. And you’ll still have your back intact.
But will it hold? That depends on how long you let it cure.
Avoiding Common Ceiling Painting Pitfalls
Ceiling painting isn’t instinctual. One slip and you’re left with drips, roller marks, or patchy coverage. You want a smooth finish without the hassle. To keep your project on track, stick to these practical rules.
First, block out your schedule. Starting a ceiling means you can’t just step away for a coffee break halfway through. Once you begin rolling, you need to maintain a “wet edge” to blend seams properly. If you pause too long, the paint will dry before you can merge the next section, leaving visible lines. Plan for a continuous run.
When working near the walls, change your technique slightly. Angle the roller handle away from the wall. This prevents the roller’s handle from scraping against the plaster or drywall, which can chip the surface or leave unsightly marks on your fresh coat.
Stop loading the roller so heavily. A common mistake is saturating the roller cover with too much paint. This leads to sagging, drips, and thick patches that won’t level out. Over-loading also creates “paquets”—clumps of paint that dry as distinct bumps rather than blending into the surface. Roll on a thinner, more even layer. It takes a bit more patience but saves you from sanding later.
What if you spot a missed spot? Catch it early. If the paint is still wet, simply roll over it gently to blend. But if the area is far from your current position and the paint has begun to skin over, do not go back. Attempting to repaint a semi-dry patch will likely pull up the existing layer or create a dark, glossy blotch that stands out. Instead, monitor your progress closely as you go. If you feel unsure about coverage, plan for an extra thin coat rather than trying to fix mistakes after they set.
Always paint in the direction of the light. This is a pro tip that makes a huge difference. By running your roller strokes parallel to the window or the main light source, any minor texture variations or roller marks will be less visible. If you roll perpendicular to the light, you’ll cast shadows from every tiny imperfection, highlighting every flaw in the surface.
Finally, respect the drying time. Don’t rush to apply the second coat just because the first feels dry to the touch. Wait for the full recommended time stated on the can. Rushing this step is how you get uneven sheen and poor adhesion. Let the paint cure properly before adding the next layer.