There is nothing more annoying than taking a cold shower in the middle of winter and having a pathetic, weak stream of water. When the outside temperature drops, you need reliable plumbing to maintain your daily comfort. But before you blame aging pipes or the budget for a complete fixture replacement, consider the silent, ever-present enemy: limescalescale. There is an amazingly simple but overlooked way to remove stubborn limescalescale in one go. It’s eco-friendly, affordable, and restores the revitalizing high-pressure shower you crave.
Identify the real culprit behind low flow
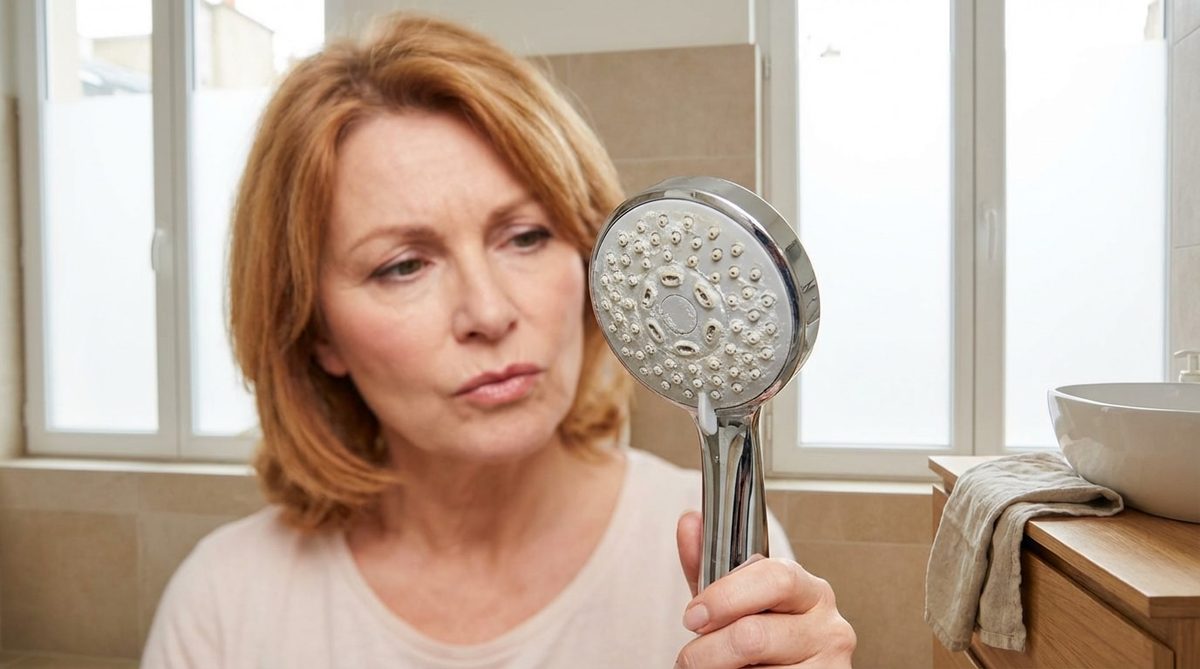
The decline is often subtle. Day by day, the pressure drops imperceptibly or the water starts spraying in irregular directions, turning relaxation into a battle against misdirected jets. This is rarely accompanied by a drop in municipal water pressure. This is the gradual accumulation of minerals – mainly calcium and magnesium – that occur naturally in tap water. When the water dries up or stagnates, these minerals crystallize. They form a hard, white crust that clogs the small jets of your shower head.
This mineral block acts as a dam. It restricts the flow and forces your water heater to work harder just to force the water through the narrowing openings. Many homeowners assume their shower head is broken and buy a new one. This is a costly mistake that produces unnecessary waste. A brass, stainless steel, or high-quality plastic case is likely still intact. It is only a victim of superficial and internal limescale.
Look closely at the flexible pins or nozzle grille. If they are surrounded by white or gray deposits, the diagnosis is clear. Fixing this problem does not require the skills of a plumber. The solution can be found in a basic chemical reaction with the items in your cupboard.
White vinegar bath technique
The most important thing is to submerge the calcified areas completely in the liquid without removing the shower head. During disassembly, there is a risk that the gaskets will be damaged or the chrome will be scratched due to poorly fitting pliers. You need to create a limited acidic environment around the fixture head.
What you need:
- A sturdy plastic bag large enough to completely submerge the shower head (a gallon size freezer bag works best).
- 300-500 ml of white household vinegar. Do not dilute it. Maximum acidity is required for rapid attack of mineral deposits.
- A strong rubber band, hair tie or piece of string.
- An old toothbrush.
The process is straightforward, but very effective. Pour undiluted vinegar into a plastic bag. Fully submerge the shower head and make sure all nozzles are fully submerged in the liquid. Pull the bag up by the handle or the flexible hose and secure it tightly with a rubber band. The structure must support its own weight so that the head can marinate in the acidic solution.
Unlike standard descaling gels on the surface, this bath method ensures that the liquid penetrates deep into the internal channels. It removes deposits not only from the outside but also from hard-to-reach pipes where it actually restricts flow. This in-depth approach makes all the difference in the final water pressure.
“Unlike commercially available gels, this bath method ensures that the liquid penetrates deep into the internal channels.”
Let it sit. The longer it is absorbed, the more the acid breaks down the calcium carbonate bonds. If there are heavy deposits, leave it on overnight. Then rinse thoroughly with warm water. Use an old toothbrush to gently remove any remaining residue from the surface of the nozzle. Turn on the shower. The water should now flow with the same force as when you first installed the fixture.
This method preserves the integrity of your current hardware. It avoids the replacement of functional parts caused by superficial neglect. The materials in your showerhead are designed to last for years, not weeks. They simply suffocated. By chemically restoring the flow, you return to a maintenance mindset rather than a consumption one. The water hits your skin with a new force. The cold of winter is losing its bite.
Patience is the real hero here. Acetic acid does not work in seconds; It takes time to break the chemical bonds of calcium carbonate crystals. Soaking for two to four hours is usually enough for routine treatment. However, if the showerhead looks more like pumice than plumbing, leave it overnight.
In the morning, the vinegar solution is likely to be cloudy and contain suspended solids. This is the scale dissolving. Carefully remove the bag and pour its contents down the toilet or sink. It cleans the pipes and cleans your shower at the same time. At the bottom of the bag you will see small pieces of limestone – evidence that the reaction worked while you slept.
Scrubbing Away the Last Residue
Vinegar does the hard work, but won’t pick up every loosened flake. The softened deposits often stick to the silicone nozzles or the metal grid. This is where the old toothbrush earns its living. Scrub the surface of the shower head vigorously. White deposits should wipe away like a soft paste with little resistance.
If your model has flexible rubber nozzles, rub them with your thumb. This will push out any stubborn bits stuck inside. Do not skip this step. Even small particles can later restrict the flow.
Final rinse and result
Turn on the water. Start cold and then switch to hot. Let it run at full power for a minute or two. This will wash away the vinegar residue and dissolved particles. The difference is immediate.
Water no longer trickles. It shoots in a strong, steady stream. Your shower will feel like new again. It’s not magic. It’s chemistry and elbow grease.
Why This Matters
Redeeming a clogged showerhead costs nothing but a few hours. This method, handed down through generations, shows that home maintenance doesn’t have to be complicated or toxic to work. Doing this twice a year will extend the life of your equipment. It also reduces waste. Less replacement means less waste in landfills. Small habits, big impact.