Spring is knocking. You can feel it. The need to replace heavy winter layers with breathable, natural textures in your home is spreading. We have an endless cycle of buying cheap, disposable furniture that will end up in a landfill within three years. The change is real. People want to slow living. They want a cozy nest, not a showroom. You want timeless pieces that age gracefully. And yes, they want to do it on a budget.
If you have an ordinary chest of drawers or a shelf from a big store, a complete renovation is not necessary. You don’t have to grind it to the bone or spend days on it. There is a shortcut. A traditional one. There is no need for expensive cans of paint and tiring primers. One product is used that changes the raw wood almost immediately.
Centuries-old secret for redesigning furniture for less than 15 euros
Why tinted wax is better than paint for wooden furniture
Carpenters have known this trick for centuries. It’s simple. It works. And it protects the wood instead of just covering it. Secret? Tinted wax.
Although modern acrylic paints are everywhere, they often mask the beauty of the grain. They sit on top. The wax penetrates. It brings out the deep, warm tones of dark oak, walnut or aged white. It highlights the grain of the wood instead of hiding it under a smooth, man-made layer.
You can find these items at any major hardware store. Look for French brands that have been perfecting this craft since the late 19th century. A 500 ml jug usually costs 9–14 euros. That’s it. This is the most cost-effective way to modernize your home without breaking the budget.
Add soul to simple IKEA-style shelves and chests of drawers
Let’s be honest. Raw pine furniture from major retailers is everywhere. These functional Swedish-style shelves and small dressers are everywhere. They are certainly affordable. But they often look sterile. Standardized. Missing a soul.
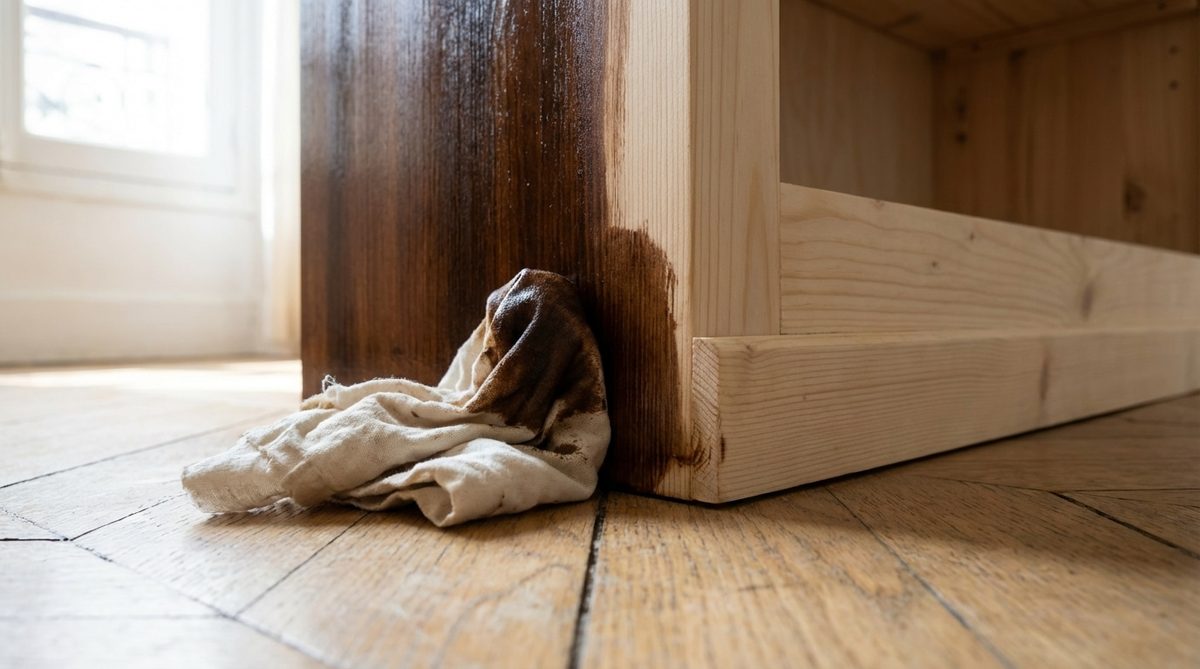
Applying tinted wax changes everything. It provides warmth to the pine fibers. Suddenly, this mass-produced shelf looks like a treasure found at a vintage Brocante market. It’s the perfect compromise. You keep the price low. You get a timeless design. You respect the natural texture of the material.
How to apply tinted wax perfectly in less than 30 minutes
Raw wood preparation with a two-step sanding process
You want the wax to absorb and not stay on the surface. So you need to prepare the wood. But don’t overthink it. This is not a toxic stripping job. All you have to do is open your pores.
Start with medium grit.
- First pass: Use 120 grit sandpaper. Smooth any rough spots and open the grain through the entire surface.
- Second round: Switch to 180 grit sandpaper. This makes the surface refined and silky smooth.
Wipe off the dust. If the surface is clean and open, the pigments of the wax are evenly distributed. No streaks. No stains. Just a uniform finish.
The right tools for applying tinted wax without streaks of tinted wax
Forget brushes. They leave brush marks. They form ridges. They cause headaches.
Take a soft cotton cloth. Or for a more professional glide use the extra fine 000 steel wool. It’s cheap. It works like a charm.
Here’s the technique:
- Dip the fabric or steel wool into the wax. Take very little. Less is more.
- Rub it into the wood. Move slowly.
- Always follow the grain. Pay attention to the direction of the wood fibers.
This gentle application allows the wax to absorb. It enhances natural imperfections. This makes the wood look lived-in and loved. Not manufactured.
The result is a piece that feels heavier. Richer. Doesn’t look new. It looks like it has a story. And cheaper than the price of a takeout dinner.
Next time we’ll look at how we can seal this surface so it can last for years of use. But for now, enjoy the smell of fresh wax and the look of wood that finally feels like your own.
最后抛光,打造持久效果
不要急于干燥阶段。 与需要静坐数小时的不透明涂料不同,这种方法以独特的高品质光泽奖励耐心。 均匀涂抹木蜡油后,将其静置 15 至 30 分钟。 确切的时间取决于室温。 您正在等待特定的化学反应:松木需要时间来吸收天然色素,而表面上的蜡开始凝固以保持其形状。
拿一块干净的羊毛布。 现在不是轻柔擦拭的时候。 使用坚定的圆周运动来抛光表面。 摩擦会产生轻微的热量,帮助蜡渗透到纹理中,呈现出既美观又具有保护性的缎面表面。 如果您想要更深、更丰富的音调,有一个值得了解的技巧。 在第一层后 24 小时涂抹第二层,非常薄。 这种微妙的强化增强了颜色深度并提供长期保护。
Why this DIY approach makes sense
It’s not just about saving money. This is all about restoring the character of the space without spending a lot of money. Basic pine furniture can often feel boring or temporary. A 30-minute staining and waxing ritual transformed the piece into one with weight, history and visual authority. It’s not just about hiding flaws. It emphasizes the natural grain of the wood.
We want to open the windows and update the home decor in the spring, and this project bridges the gap between financial awareness and home comfort. This proves that you don’t need expensive materials to create a well-designed look. A small change of perspective from a bucket of paint to a can of wax can completely change the harmony of a room. Raw pine doesn’t need to be covered up. It needs to be revealed.
So, are you ready to replace your usual paint tray with a simple cloth and a can of wax? The end result is unique, tangible and completely yours.